How to fix failed transactions?
When minting Gems you may get failed transactions that
would look similar to the following.

This is a common error in Polygon. The answer is to
simply increase your gas. The following instructions
describes how to do this.
How to increase gas in MetaMask browser (Laptop)?
Click on your account icon, then find "Advanced gas
controls" under "Advanced" in the settings menu:

Once you've flicked this switch, the option to 'Edit'
gas will appear when sending a transaction:

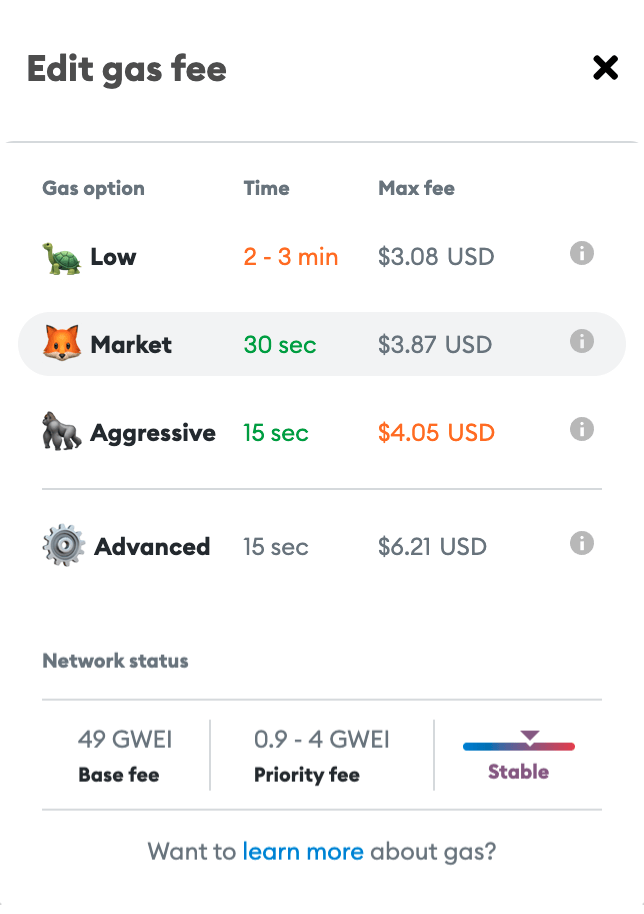
Clicking on 'edit' should allow you to modify the three
applicable fields as follows:
How to increase gas in MetaMask mobile?
MetaMask Mobile already has the ability to precisely
configure gas built-in; you do not need to enable it in
settings.
When you get to the final screen before sending your
transaction, you will see an "Estimated gas fee". To the
right, the fee will appear underlined in blue:

Click on the fee, and a menu will appear with a slider,
and another option to click on "Advanced Options". When
you do, this menu will open and you will have the
opportunity to customize your gas fully:

How to buy Polygon USDC?
The easiest way to buy Polygon USDC is with Ramp.
1. Go to ramp.network
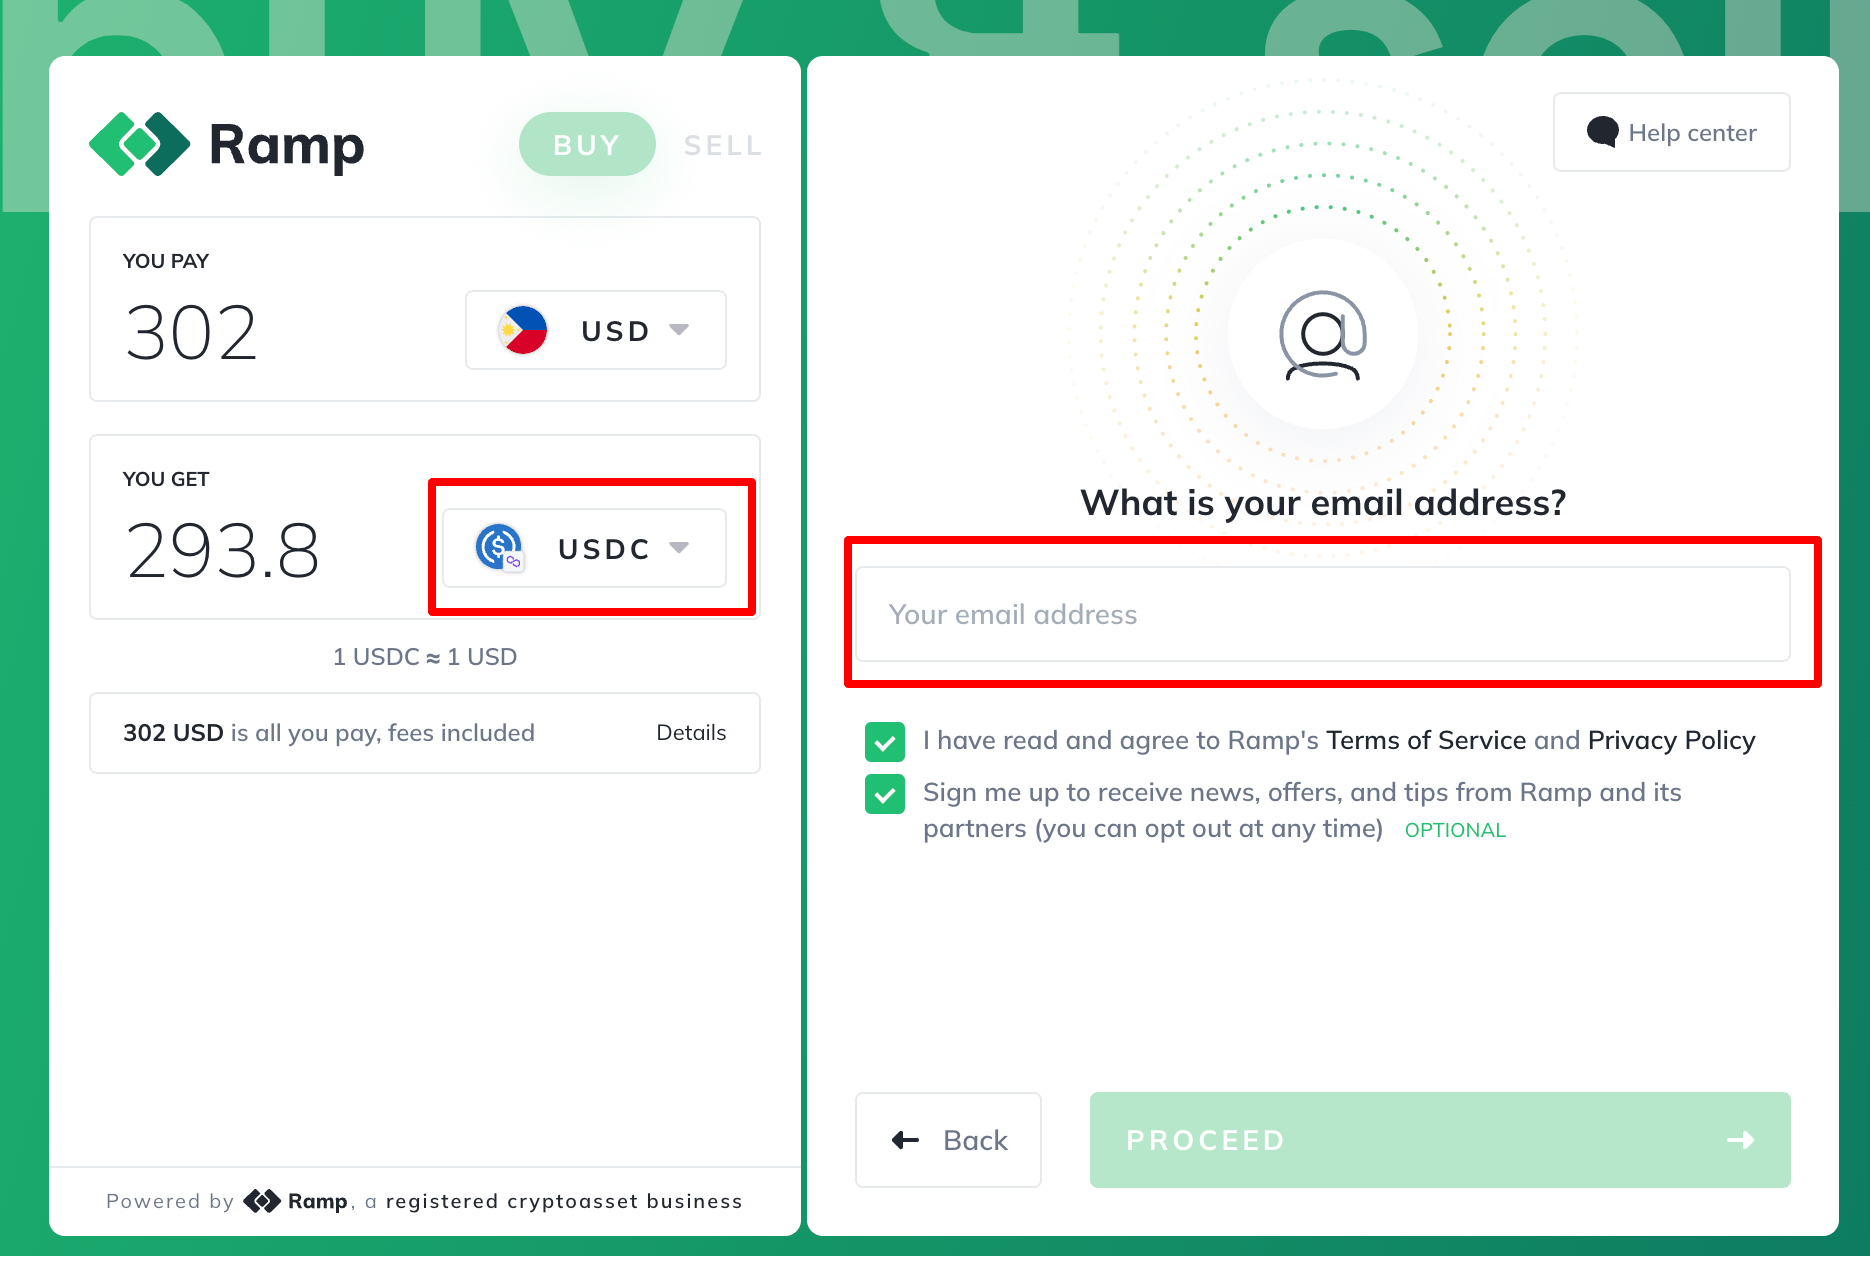
2. Select USDC Polygon and enter your email address.
They will email you a code. Enter that code and continue.

3. Enter your Polygon Wallet address. You can copy this from MetaMask.

4. Next, click card and begin entering your card information on the next screen.
Setup a Polygon Wallet (Mobile)?
There are many crypto wallets to choose from, but
MetaMask
is the most popular. With direct integration on
OpenSea
— the largest Polygon NFT marketplace and a gallery to
view your digital collectibles, MetaMask is also the
best choice for beginners.
Metamask is a kind of digital wallet, but it is far
different from your ordinary digital wallet, Metamask uses
and takes advantage of the new blockchain technology, to
store, and secure all the information and transactions
of its users.
Metamask is not only a wallet but also a key, it will
serve as a key at some of your transactions online, instead
of creating and memorizing some different passwords and
accounts and using it on every transaction, Metamask will
serve as a universal key that enables you to complete the
transaction with just a click of a button, all you need to
do is to set up a Metamask Wallet, create your password,
memorize your 12 secret phrases (recovery phrase) and it's
all done, once the setup is complete, you can do all
transaction using your Metamask Wallet with a power of a
click.
1. Download MetaMask Mobile App

To set up MetaMask on a mobile device, you will need to
visit either Google Play or the App Store. Here are the
official download links for MetaMask:
2. Mobile App Setup

Follow the instructions, read through the terms,
and click "I Agree" to continue the setup
process.

The first step in getting set up with MetaMask is creating
a wallet. Click on the "Create a Wallet" button.
You will then need to create a password with a minimum of
eight characters that you will use to log in to the
mobile app in the future.
3. Secret Backup Phrase

Your Secret Backup Phrase is a way to easily backup and
restore your account at any time. It consists of twelve
words in a particular sequence. It is essential to
memorize this, write it down on a piece of paper and place
it in a safe place.
Without your Secret Backup Phrase, it will be impossible
to restore your account. You can download the phrase and
store it on an external encrypted hard drive or storage
device for added security. We do not recommend copy and
pasting it into a notepad and leaving it on your desktop.
If your computer gets stolen, hacked, or someone finds
the file, someone can easily log in to your MetaMask wallet.

Confirm your Secret Backup Phrase on the next on-screen
prompt when you have it safely stored. This step ensures
you have the correct phrase on hand in case you need to
restore your account. After confirming your Secret Backup
Phrase, click on the "All Done" button. You have
now created a MetaMask wallet and are connected to the
Polygon Mainnet and congratulations you have now your first
Metamask Wallet!
4. Add Polygon Network
From the account options, which is a circle icon, go to Settings.
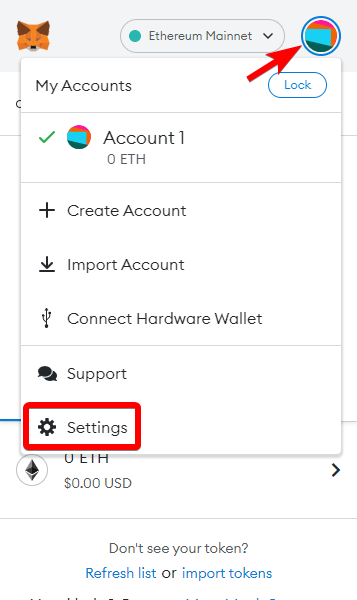
Once you are in settings, select Networks.
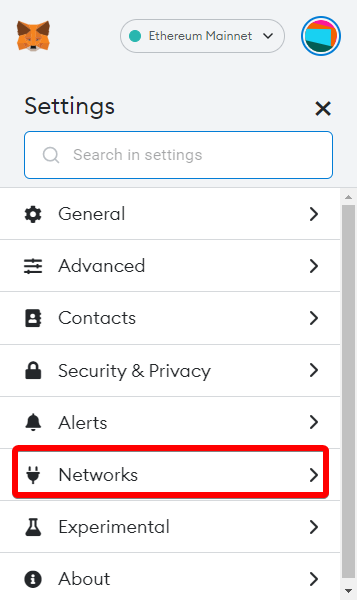
Press the Add Network button.
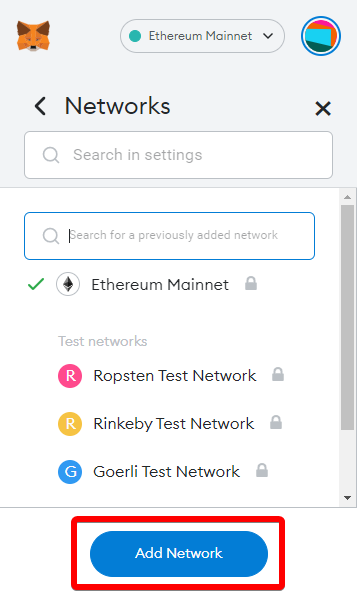
You'll need to add the following details on the
Add a network page that will open.
Click Save when you're finished.
| Network Name |
Polygon |
| New RPC URL |
Choose any of the following:
https://polygon-rpc.com
https://rpc-mainnet.maticvigil.com
|
| Chain ID |
137 |
| Currency Symbol |
MATIC |
| Block Explorer URL |
https://polygonscan.com/ |
Your settings should look similar to the following image.
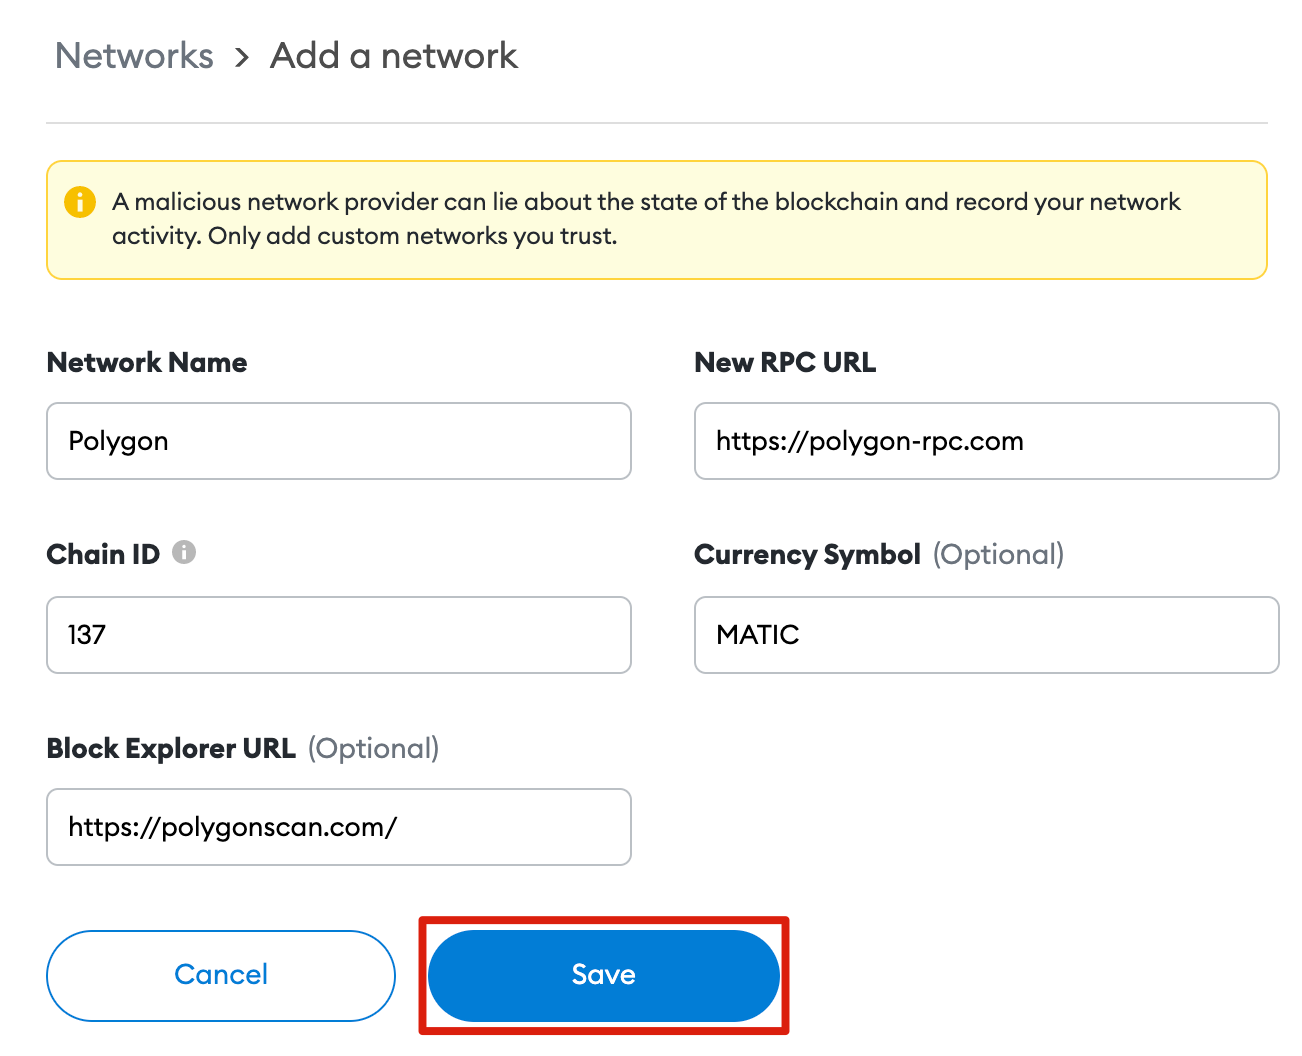
You'll now successfully be connected to the Polygon network.
Next Steps:
Don't have Polygon? Then check out
How to buy USDC with MetaMask?
Setup a Polygon Wallet (Laptop)?
There are many crypto wallets to choose from, but
MetaMask
is the most popular. With direct integration on
OpenSea
— the largest Polygon NFT marketplace and a gallery to
view your digital collectibles, MetaMask is also the
best choice for beginners.
Metamask is a kind of digital wallet, but it is far
different from your ordinary digital wallet, Metamask uses
and takes advantage of the new blockchain technology, to
store, and secure all the information and transactions
of its users.
Metamask is not only a wallet but also a key, it will
serve as a key at some of your transactions online, instead
of creating and memorizing some different passwords and
accounts and using it on every transaction, Metamask will
serve as a universal key that enables you to complete the
transaction with just a click of a button, all you need to
do is to set up a Metamask Wallet, create your password,
memorize your 12 secret phrases (recovery phrase) and it's
all done, once the setup is complete, you can do all
transaction using your Metamask Wallet with a power of a
click.
To create your
MetaMask account,
simply download the mobile app on your iOS or Android device or
browser extension for your desktop (MetaMask currently
supports Chrome, Firefox, Brave, and Edge). Unless you
strongly prefer to buy NFTs on your mobile device, we
recommend the desktop app as it's easier for first-time users.
1. Choose Your Platform

After clicking the download now button it will lead you to
installation options, you can choose from the three operating
systems that you want to use Chrome for PC, iOS, and Android.
Since this tutorial is for laptops, install Metamask on
Chrome browser extension, based on the operating system
that you are using. The appearance may vary a little but
the procedure is almost the same.
To install MetaMask on your mobile phone, check out
Setup an Polygon Wallet (Mobile)?
2. Add Metamask to Chrome
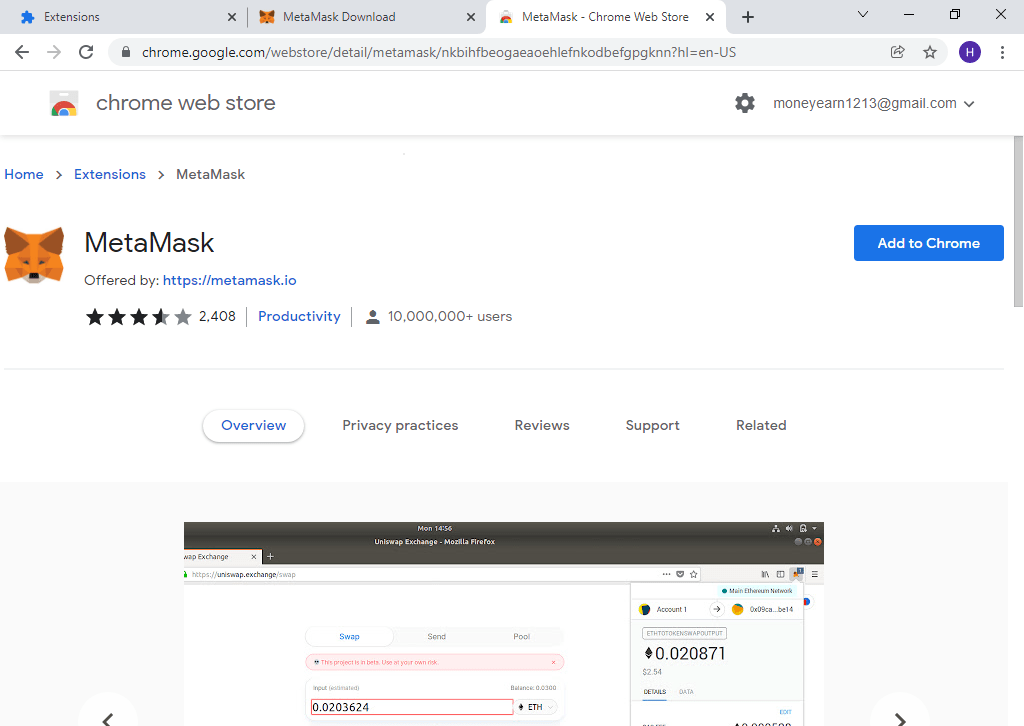
Next step, after clicking the install to Chrome, a new tab
will appear its a chrome web store, just click the button
that says "Add to Chrome" just wait a few minutes
or seconds and another tab will appear it is now ready to
set up our first Metamask Wallet.
3. Setting Up Metamask Wallet

In a separate tab, a greeting from Metamask will appear,
just click the get started button, then there will be two
options the import wallet, and create a wallet, since this
is our first time just choose create wallet button and you
will be head to Metamask terms that has a line like
"Help us Improve Metamask", just click the agree
button to continue.
4. Creating Password for your Metamask Wallet
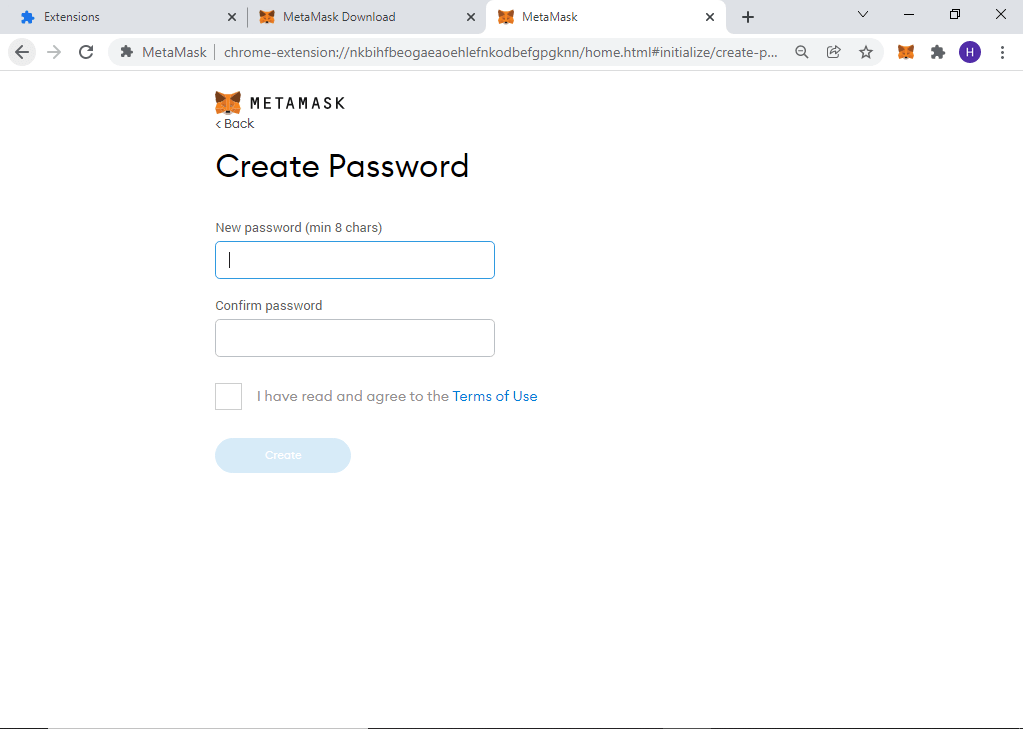
Next is creating a unique password, this is very important
since you will be using this password every time you open
your Metamask Wallet, the password must be at least a minimum
of 8 characters, as a rule of thumb avoid using passwords
like birthdays, wedding anniversary or anything that can
easily guess.
5. Secure Your Secret Phrase

After creating a password, Metamask will introduce you to
the secret recovery phrase and give you some information
about it, like what you should do and what you should not.
After it finishes, you will get your 12 secret recovery
phrase. Before proceeding to the next step make sure you
write down the 12 secret phrases correctly and orderly,
store your secret phrase in a safe place dont ever lose
or forget about the phrase since it is the only way to
retrieve your Metamask account once your device was lost,
damaged or stolen.
After writing down your secret phare just click next to
proceed.
6. Confirm Your Secret Recovery Phrase

Next step you will need to confirm the secret recovery phrase
that you've written, just click the phrases according to
the right sequence, after confirming your secret phare is
has been done, congratulations you have now your first
Metamask Wallet!
7. Add the Polygon Network
For a quicker way, click
here to add Polygon to your MetaMask. Read the rest if you want to learn how to do it manually.
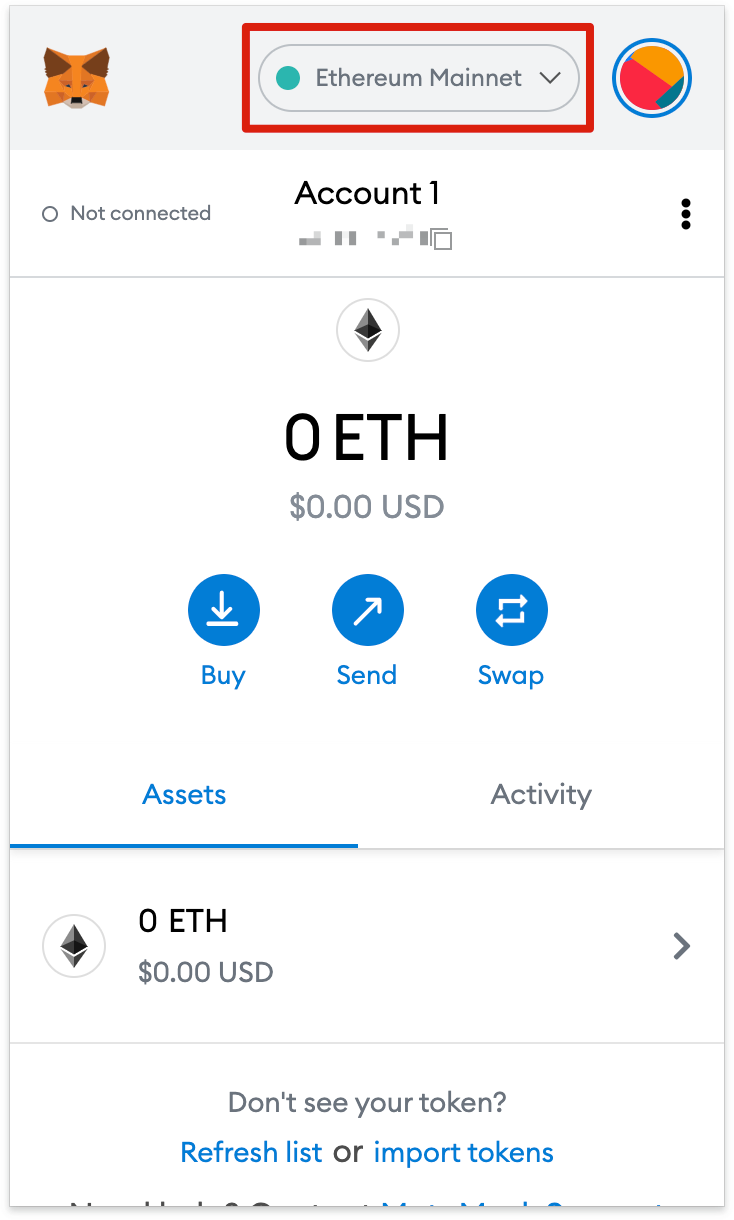
Adding Polygon support to your wallet involves adding some network
details to the extension. First, open MetaMask and click the network
dropdown menu.
Next, click Add Network on the pop-up.
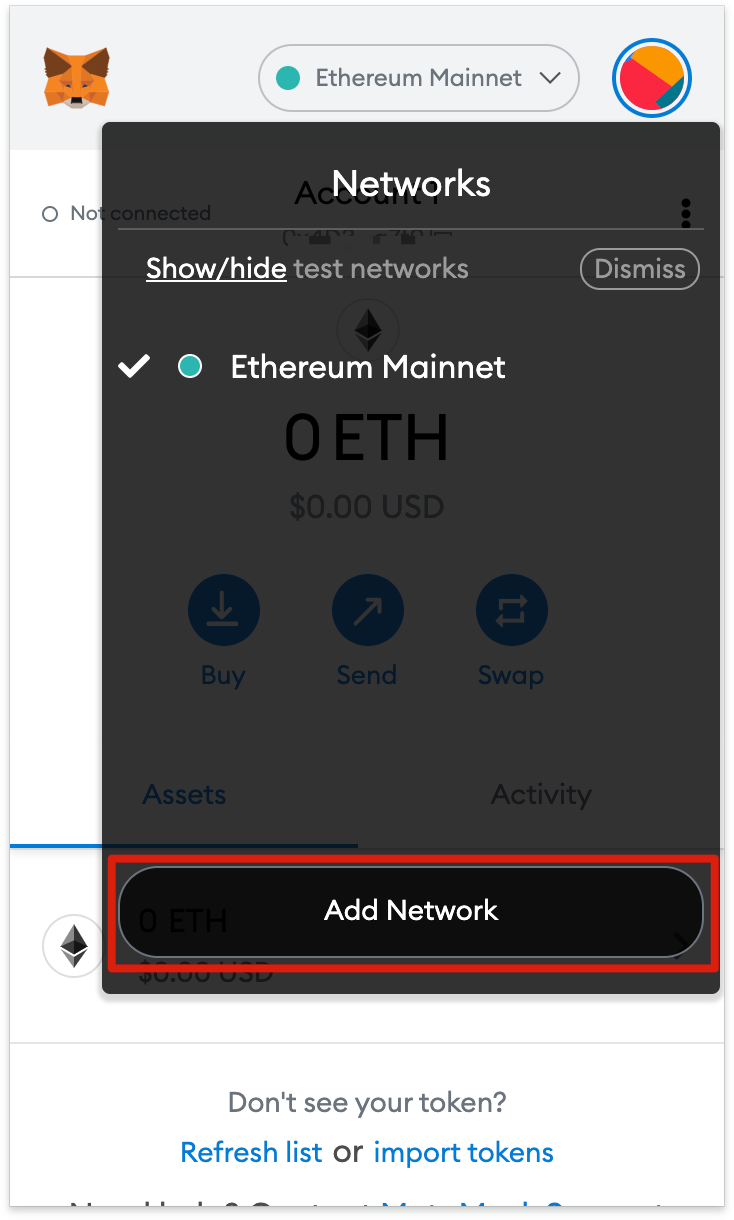
You'll need to add the following details on the
Add a network page that will open.
Click Save when you're finished.
| Network Name |
Polygon |
| New RPC URL |
Choose any of the following:
https://polygon-rpc.com
https://rpc-mainnet.maticvigil.com
|
| Chain ID |
137 |
| Currency Symbol |
MATIC |
| Block Explorer URL |
https://polygonscan.com/ |
Your settings should look similar to the following image.

You'll now successfully be connected to the Polygon network.
Next Steps:


